There is so much in this Gummy Bear Sacrifice demonstration! No fail, it is a memorable way to grab your students’ attention during the first or second week of school! It also fulfills the following important goals:
- students learn how to draw and label scientific diagrams
- students learn why it’s so important to follow lab safety rules
- students learn the names of some of the common pieces of lab equipment
- students gain the background knowledge necessary for understanding the science safety contract
- students are motivated to create their own safety rule poster
I teach 8th grade physical science, and my classroom has gas and working bunsen burners. We also have the basic chemistry lab equipment that is necessary for this demonstration. So, I am writing this for a teacher who has access to these things in the classroom. Of course, this is way more exciting for students as a live demo, but if you don’t have gas or the other equipment necessary, you can certainly follow the rest of the instructions below and then show this demonstration as a video. (I found this one: Gummy Bear Demonstration)
Step 1 : Introduce Equipment
Gather and set up these materials on a demonstration table or area where all students can see: goggles, a ring stand, a test tube clamp, a large test tube, tongs, a bunsen burner and tubing, a striker, a scoopula, a bottle of Potassium Chlorate, and a gummy bear
Have students date and title a notebook page : Gummy Bear Demo. Tell them that they are going to be sketching some lab equipment and labeling it. Go through each of the pieces of equipment listed above and ask if anyone knows the name. Review all of the names. Then, give about 7 minutes for students to sketch the set-up and label all of the equipment. This will test their working memory of the equipment names after the discussion. When I give this direction, the class gets totally silent–everyone sketching seriously!
Really cool digital option! The website Chemix.org lets you create beautiful lab setups virtually! They have all of the lab equipment, plus neat accessory features like bubbles, flames, safety equipment, and the ability to change the colors of the chemicals, etc. There is also a neat feature that smart-detects subscripts in chemical formulas 👍 Your students can create the labeled before and after lab setups and download the image to submit to your through Google Classroom as their first lab grade!


Step 2 : Get Dramatic
Discuss safety precautions. Tell the students that you are going to be conducting this demonstration for them. Ask: what are some things that I should take into consideration? Hopefully students will offer some ideas about safety such as, “You should wear goggles,” “You should tie your hair back,” etc.
Do those things that they suggest and make sure to note the following safety precautions aloud and do them dramatically to really make a point:
- put on safety googles
- tie back long hair
- point out your closed-toed shoes
- secure any baggie clothing (point out that hoodies can be very dangerous because of the strings!)
- open a window
- pretend you’re chewing gum and dramatically take it out of your mouth and throw it away (noting that chemicals can get into the gum and be ingested)
- have some papers sitting near the demo area and dramatically remember to move them away from the bunsen burner
- make sure students are not sitting near the demo area and if they are, ask them to scoot their chairs back
- note aloud the locations of the safety blanket, fire extinguisher, and eyewash station in your room (give a quick explanation of how to use these)
- IMPORTANT: when you secure the test tube into the test tube clamp on the ring stand in preparation for the demo, tilt the test tube away from you. Ask the students why they think you tilted the test tube. They should know that in most instances, if you are heating substances in a test tube with a bunsen burner, you should have the tube tilted away from anyone’s face or body to avoid chemicals spraying out on someone AND because what goes up must come down! If there is a violent reaction (which there will be in this case!), the products that shoot straight up will come raining back down and this can be very dangerous!
I don’t have students list these things because I want their undivided attention as we discuss them aloud.
Step 3 : Set the Scene
Explain the steps that you’re doing aloud using the lab equipment names:
- First, I’m going to open the Potassium Chlorate bottle and use the scoopula to put a small scoop of it into the bottom of the test tube. I’m going to put the bottle lid right back on it.
- Next, I’m going to light my bunsen burner using the striker and place the bunsen burner underneath the test tube apparatus.
- (While the Potassium Chlorate is melting) Now, when a bunsen burner is lit, you are never to walk away from it. Do you see how hard it is to see that this bunsen burner is lit right now? If I were to walk away and Jessica happened to come over here, she may not see this flame (which is over 1500 degrees Celsius!) and could get seriously burned.
- But, I would like to turn off the lights so that you will be able to see the reaction really well. So, Billy, would you mind turning off the lights, please? (When Billy turns off the lights, I like to point out the inner flame of the bunsen burner flame and talk about how the deep blue color indicates that this is the hottest part of the flame)
- Okay, now that the Potassium Chlorate is melted, I’m ready to sacrifice my gummy bear! I’m going to use my tongs to carefully pick up the gummy bear.
- I’m going to orient myself so that I am standing behind the test tube opening and I’m going to let everyone around me know that a chemical reaction may occur so that they can get out of the way.
Step 4 : Sacrifice the Gummy Bear!
Drop in the gummy bear! The reaction is a gorgeous, violent purple/pink! It is super loud, too! You will have a roomful of Oooohs and Aaaaahs!
Step 5 : Draw and Label
When the reaction is complete, ask the students to write down their observations of what happened during the chemical reaction. They should draw a picture and label it, describe the color, the smell (burnt marshmallows!), and the heat given off. This is a good time to demonstrate how to smell by wafting using your hand and explain that you should never directly smell a chemical!
Step 6 : Hot Glass Looks Like Cold Glass!
Before moving on, explain that since the test tube glass is so hot, you are going to wait to take apart the apparatus. Explain that hot glass looks like cold glass and that you can’t tell the difference! You may also want to cover the fact that hot glass will shatter in cold water. I tell my students the story of how I shattered my mom’s glass coffee pot when I was a teenager because I went to wash it in the sink but it was still hot!
At this point, my students have been paying attention to some very important and relevant safety rules, they are excited about what we are going to be doing in science this year because they loved the explosion, and they are proud of their labeled diagrams and detailed observations of this very neat chemical reaction! For an extra extension, you could even have everyone write out the chemical equation (C12H22O11 + O2 + KClO3 –> KCl + CO2 + H2O) and label the reactants and products (sucrose sugar + oxygen gas + potassium chlorate yields potassium chloride + carbon dioxide + water).
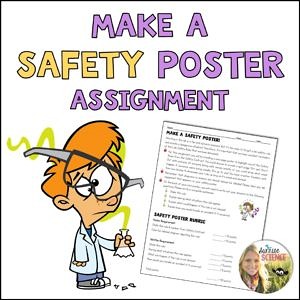
The following day, I hand out the Flinn Lab Safety Contracts and assign the Lab Safety Poster project! Grab it for free here!
If you try out this demonstration lesson, let me know how it goes in the comments below!