“Make sure you study for the test!”
How many times have you said this to your middle school students… only to realize that some of them have absolutely no idea what you mean by study? For many middle schoolers, studying means rereading their notes, looking over a study guide, or maybe asking a parent to quiz them the night before the test. But studying is actually a skill — and it’s one that we can teach!
Over the years, I’ve found that my students do much better when I give them specific ways to review the material instead of simply telling them to study. Here are some of my favorite ways to help middle school science students prepare for an assessment.
1. Give Students a Study Guide — But Make Them Actually USE It
I love giving my students study guides before unit assessments, but I don’t want the study guide to become another worksheet that they complete, shove into their binder, and never look at again.
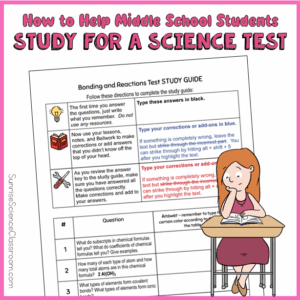
One of my favorite study guide routines uses three different colors: black, blue, and red.
- First, students answer the study guide questions independently using black. I encourage them to try to answer as much as they can without immediately looking through their notes. This gives them a much better idea of what they actually know.
- Next, they use their notes and class resources to add information or improve their answers using blue.
- Finally, I provide the answer key. Students compare their responses with the key and use red to add anything they missed or correct misconceptions.
The colors make their learning really visible. Instead of seeing a completed study guide and thinking, Yep, I know all of this, students can actually see which concepts they knew independently and which ones still need some attention. And that last part is important: the goal isn’t just to finish the study guide. The goal is to figure out what you still need to study.
One extension to this is to have students add a “What I Still Need to Study” section at the bottom of the study guide. Here, they can identify three to five topics they need to review again before the assessment. You can even have them turn those topics into a mini study plan:
I know this well: ______
I need a little more practice with: ______
I definitely need to review: ______
That tiny reflection helps students start thinking about studying as something more intentional than simply rereading everything.
I provide a study guide in this format for each of my unit assessments — check them out here.
2. Turn Test Review Into a Mild, Medium & Spicy Challenge 🌶️
One of my favorite ways to make test review more engaging is to divide review questions into three levels:
- Mild 🌶️ questions focus on basic knowledge and recall.
- Medium 🌶️🌶️ questions require students to explain ideas, make connections, or apply what they know.
- Spicy 🌶️🌶️🌶️ questions challenge students to apply concepts to new situations or explain more complex phenomena.
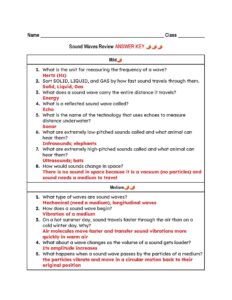
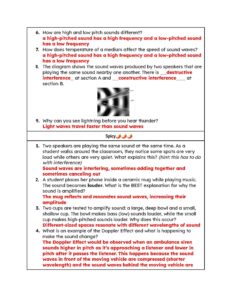
For example, in my Sound Waves review, a Mild question asks students to identify the unit used to measure frequency or explain what a reflected sound wave is. Medium questions move into concepts like explaining why sound travels faster through warm air or connecting volume to amplitude. Then the Spicy questions ask students to really use their understanding. They might explain why some locations in a room sound louder than others when two speakers are playing, why putting a phone inside a ceramic mug can amplify its sound, or how the Doppler Effect changes the sound of a moving siren.
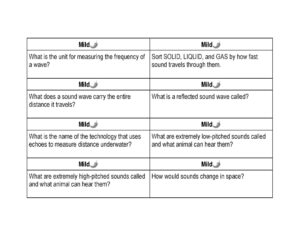
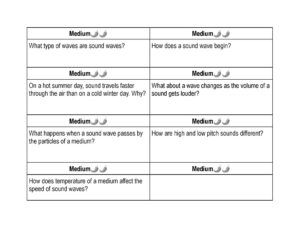
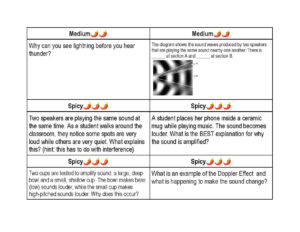
I especially love this format because the levels aren’t based on students — they’re based on questions. I put up the “Menu” on the class screen that tells students how many of each type of question they need to answer. For example:
- 8 🌶️ Mild questions
- 5 🌶️🌶️ Medium questions
- 2 🌶️🌶️🌶️ Spicy questions
Everyone can start with Mild. Everyone can attempt Spicy. And there’s something about calling a question “Spicy 🌶️🌶️🌶️” that makes a challenging question feel much less intimidating!
To use Mild, Medium & Spicy Questions, you can type questions into a simple table on a Google Doc, print enough copies of the questions so that any student or group will have access to a good number of the questions. Cut apart the questions and lay them out in “Mild,” “Medium,” and “Spicy” areas around your classroom. I like to have students work in partners or small groups. They decide together which questions they want to answer, tape the questions to a small poster board or large piece of construction paper, and work together to write the answers on the paper.
I also like providing a written review sheet that mirrors the question cards so students have something they can take home. My Sound Waves version, for example, organizes the answer key into the same Mild, Medium, and Spicy categories, so students can check their understanding after they’ve attempted the questions themselves.
3. Teach Students to Practice Retrieval
This is probably one of the biggest shifts we can help middle schoolers make: Looking at information is not the same as knowing it.
Instead of rereading their notes over and over, teach students to close the notebook and try to retrieve the information from memory. Give them a blank sheet of paper and two minutes to write everything they remember about convection. Have them draw and label a diagram of the rock cycle without looking at their notes. Ask them to explain Newton’s Third Law to a partner. Give them five questions from the study guide and have them answer without using any resources. Then let them check their work.
That moment when students realize, “Ohhh… I thought I knew this, but I couldn’t actually explain it,” is incredibly valuable.
4. Have Students Create Their Own Practice Questions
Instead of always giving students the review questions, have them write some! After completing a unit, assign each student a topic and have them write:
- one easy recall question
- one medium application question
- one challenging question
You can collect the best questions and use them for a class review game, have the students create Blooket quizzes to give to each other, or have them create a paper quiz and trade with someone else. You could also have the students categorize their questions as Mild 🌶️, Medium 🌶️🌶️, and Spicy 🌶️🌶️🌶️ so that they have to think about what actually makes a question more challenging.
5. Try a Color-Coded Brain Dump
This one takes almost no prep. Put a unit topic on the board — Plate Tectonics, for example — and give students three minutes to write down everything they can remember. No notes. No textbook. No Chromebook.
Then let them open their resources and use another color to add everything they forgot. Sound familiar?
It’s essentially a miniature version of the three-color study guide strategy, and it helps students distinguish between recognizing information and actually being able to retrieve it. You can do this several days before the assessment and repeat it the day before. Students can actually see how much more they’re able to retrieve the second time.
6. Do an Alphabet Review
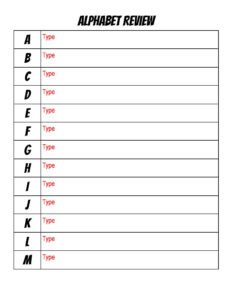
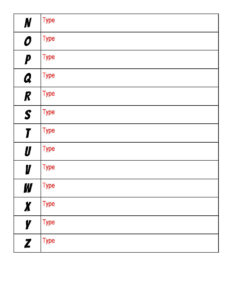
Another easy, low-prep way to get students talking about the content is an Alphabet Review. I have students work in small groups. Instead of asking every group to tackle the entire alphabet at once, I divvy up the letters and assign each group a few to start with — maybe D, E, F, and G. Give them about 6-7 minutes to come up with at least one relevant vocabulary word, concept, scientist, example, or idea from the unit that begins with each letter. Next to each word, they should add a quick definition or note explaining how it connects to what they’ve learned.
Circulate the room during this time, keeping an eye out for especially good connections. When that time is up, announce one or two ideas you noticed from each group and ask the students who came up with them to explain their thinking. This naturally turns into a class discussion — and gives you the chance to clarify misconceptions or review concepts that students seem shaky on.
After discussing each set of letters, students can add the class’s ideas to their own Alphabet Review Table. By the end, they’ve collaboratively built an A–Z review of the entire unit without it feeling like another traditional study guide. They can even color-code this now to indicate the concepts that they should probably study later.
7. Make Review More Fun with Mad Lib Task Cards
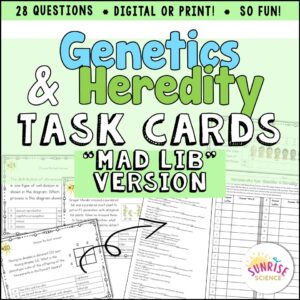
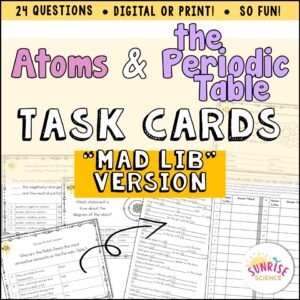
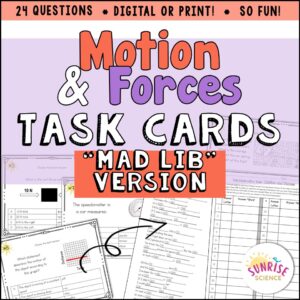
Sometimes students just need a way to practice a LOT of questions without it feeling like they’re completing another worksheet! That’s why I created my Mad Lib Task Cards. Students work through a set of multiple-choice review questions, but here’s the twist: every answer choice has a random word associated with it.
As students answer each question, they record both their answer and its corresponding word. They have no idea what those words are for until they’ve finished all of the task cards! At the end, students use the words they’ve collected to complete a Mad Lib. If something doesn’t sound quite right, that’s their cue to go back, check their answers, and figure out where they may have made a mistake.
I love this format because students are still doing the important work of retrieving and applying what they’ve learned — but the little mystery at the end makes review much more fun!
Want to try this review format with your students? I currently have Mad Lib Task Card sets for Genetics & Heredity, Atoms & the Periodic Table, and Motion & Forces — and I’m working on adding more!
8. Use a Traffic Light Review to Help Students Decide What to Study
One of the biggest challenges for middle schoolers is figuring out what they actually need to study. If we tell students to “study your notes,” many of them will simply read through everything from beginning to end — including the concepts they already know really well! A Traffic Light Review helps students identify where they need to spend their study time and gives them a strategy for what to do next.
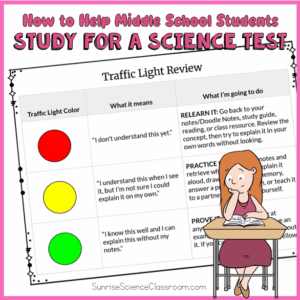
Give students a list of the major concepts from the unit and ask them to assign each one a traffic light color. Red means, “I don’t understand this yet.” Yellow means, “I understand this when I see it, but I’m not sure I could explain it on my own.” And green means, “I know this well and I can explain it without my notes.”
But here’s the important part: students shouldn’t stop after choosing a color! The color tells them what their next step should be.
- For a 🔴 RED concept, students need to RELEARN IT. They should go back to their notes or Doodle Notes, study guide, reading, or another class resource and review the concept. Then, they should close the resource and try to explain the concept in their own words.
- For a 🟡 YELLOW concept, students need to PRACTICE IT. Instead of simply rereading the material, they should close their notes and try to retrieve what they know. They could explain the concept aloud, draw and label something from memory, answer a practice question, or teach the concept to a partner. Then they can check their notes to see what they missed.
- And a 🟢 GREEN doesn’t mean a student gets to skip the concept completely! They need to PROVE IT. Without looking at their notes, can they explain the concept? Draw it? Give an example? Answer a question about it? If they can’t, that topic might actually belong back in the yellow category.
I created this Traffic Light Review Table to help students understand exactly what each color means and what they should do next. I especially like the idea of having students reassess their colors after they’ve had some time to study. The goal is to actually watch concepts move from red → yellow → green as their understanding improves. Download the FREE Traffic Light Review here!
This is also a great activity to do before handing students a study guide or beginning a class review. Once students have identified their red and yellow concepts, they know where to focus their attention during the rest of the review period. Instead of spending most of their time practicing what they already know, they’re learning how to study with a purpose.
And that is really the skill we’re trying to teach: not just “Study for your test!” but “Here’s how to figure out what you don’t know yet — and here’s what you can do about it.” Once students have identified their red and yellow concepts, they need opportunities to relearn and practice them. That’s where a good study guide or an engaging review activity can really help!
The Bigger Goal: Teach Them How to Study
Of course, we want our students to do well on our science test. But there’s a bigger goal here. Middle school is the perfect time for students to start figuring out how they learn. They need opportunities to discover that rereading isn’t always enough. They need to experience what it feels like to retrieve something from memory, realize they don’t quite know it, go back and review it, and then successfully retrieve it later.
So instead of simply saying: “Don’t forget to study tonight!”, we can start giving students an answer to the question they’re probably thinking: “Okay… but how?” And hopefully, little by little, we’re helping them build study habits that will stick with them long after they leave our science classrooms.